Joao Alves
Senior Engineering Manager at IndeedFlex
Kotlin backend? Yes it’s possible

Hi everyone, welcome to article number 7 in the series, today we’re going to look at something different. We all know how powerful Kotlin is as a language and keep reading that you can build a full stack solution with it so why not give it a try and build a simple backend to test those claims.
Recently at work, I needed to test my network layer before the backend APIs were actually implemented. The quickest way I found to do this was to actually create a GitHub gist with the desired Json response and then use that gist raw URL in my Retrofit service rather than the real API URL. This works fine but it’s not ideal as you can imagine.
First, every time you need to make a change you need to go to GitHub and edit the gist, open its raw version again as a new URL is generated, copy it and finally update your retrofit service again.
Now, usually, you would want to test your network layer with more than one response so as you can imagine this can become a very tedious task quite easily. And if you’re testing more than one API it becomes even worse.
So I decided to do some research on how to build the simplest backend in Kotlin and guess what? It’s quite simple and it literally takes 10 minutes to set up and get it running locally on your machine. For that, we’re going to use Ktor, and what is Ktor you ask? Well per the official website:
Ktor is a framework for building asynchronous servers and clients in connected systems using powerful Kotlin programming language
So, it’s basically just another web framework as there are many out there, but built with Kotlin for Kotlin so exactly what we want. Let’s jump into action and build our simple backend with it.
Local machine setup:
The first thing we need to do is to install IntelliJ IDEA to create our standalone Kotlin gradle based application (this is not the only way of achieving the result but it’s the simplest way so we’ll go with it).
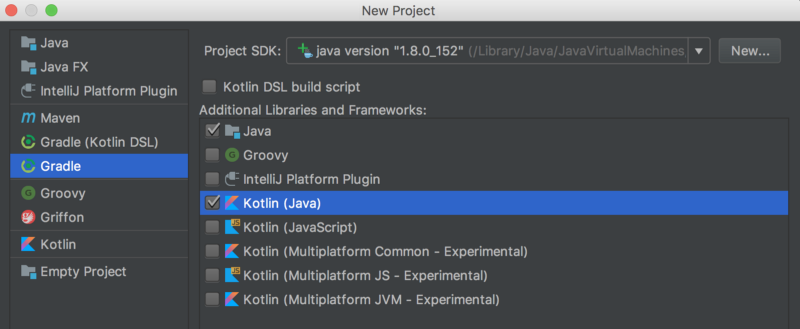
After installing IntelliJ let’s go ahead and create a new project. On the first screen select a Gradle Project from the left, and on the right pick both Java and Kotlin as in the image below:
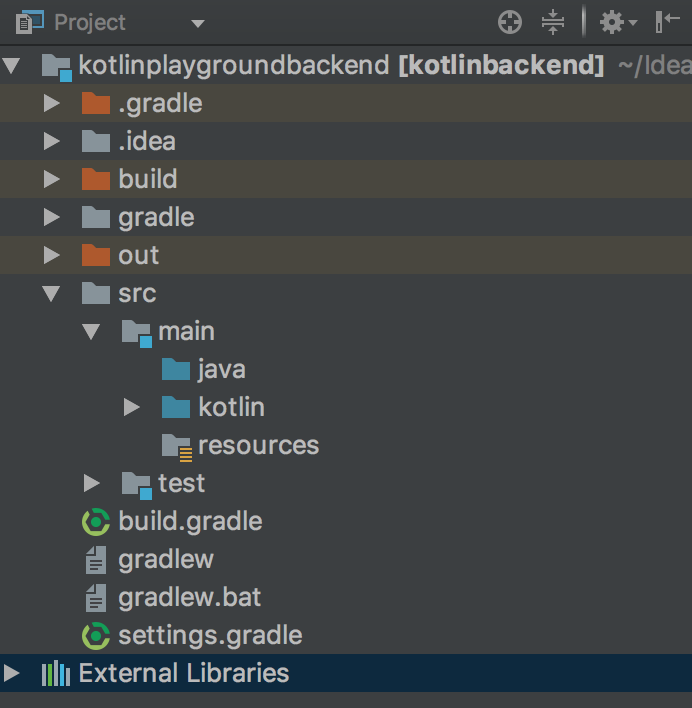
Then pick a GroupId — same as your application id if you’re building an android app, and an ArtifactId — the name of your app. The rest of the setup you can tweak as you wish or leave as it is by default, it’s fine. After finishing you should have a project structure like the one below:
Cool, so we have our project structure ready, quick and easy right? Now let’s create our simple backend. First, we need to add the Ktor dependencies to our project so let’s look at our build.gradle file:
buildscript {
    ext.kotlin_version = '1.2.30'
    ext.ktor_version = '0.9.1' // ktor version

    repositories {
        mavenCentral()
    }

    dependencies {
        classpath "org.jetbrains.kotlin:kotlin-gradle-plugin:$kotlin_version"
    }
}

group 'com.jcmsalves.kotlinplayground.backend'
version '1.0-SNAPSHOT'

apply plugin: 'java'
apply plugin: 'kotlin'

sourceCompatibility = 1.8

repositories {
    mavenCentral()
    maven { url  "http://dl.bintray.com/kotlin/ktor" } // ktor maven
    maven { url "https://dl.bintray.com/kotlin/kotlinx" } //kotlinx maven
}

dependencies {
    compile "org.jetbrains.kotlin:kotlin-stdlib-jdk8:$kotlin_version"
    testCompile group: 'junit', name: 'junit', version: '4.12'

    compile "io.ktor:ktor:$ktor_version" // ktor dependency
    compile "io.ktor:ktor-server-netty:$ktor_version" // ktor netty dependency
}

compileKotlin {
    kotlinOptions.jvmTarget = "1.8"
}
compileTestKotlin {
    kotlinOptions.jvmTarget = "1.8"
}
Go ahead and add the lines commented above to your gradle file, that will sort all the dependencies. Now, create a new package inside the kotlin source folder, name it as your project or something similar and then create a Kotlin file with the following content:
package backend

import io.ktor.application.*
import io.ktor.http.*
import io.ktor.response.*
import io.ktor.routing.*
import io.ktor.server.engine.*
import io.ktor.server.netty.*

fun main(args: Array<String>) {
    embeddedServer(Netty, 8080) {
        routing {
            get("/") {
                call.respondText("Hello from Kotlin Backend", ContentType.Text.Html)
            }
        }
    }.start(wait = true)
}
Now run the app, go to your browser, type localhost:8080 and voila your welcome message is on the screen. That’s it, we just built the most basic backend in Kotlin, super easy right?
But a fancy welcome message doesn’t help us much, we actually need this to return some Json to test our network layer implementations so let’s update our server to do so:
package backend

import io.ktor.application.*
import io.ktor.http.*
import io.ktor.response.*
import io.ktor.routing.*
import io.ktor.server.engine.*
import io.ktor.server.netty.*

fun main(args: Array<String>) {

    val jsonResponse = """{
            "id": 1,
            "name": "Joao Alves",
            "username": "joao.alves",
            "email": "joao.alves@example.com"
        }"""

    embeddedServer(Netty, 8080) {
        routing {
            get("/") {
                call.respondText(jsonResponse, ContentType.Application.Json)
            }
        }
    }.start(wait = true)
}
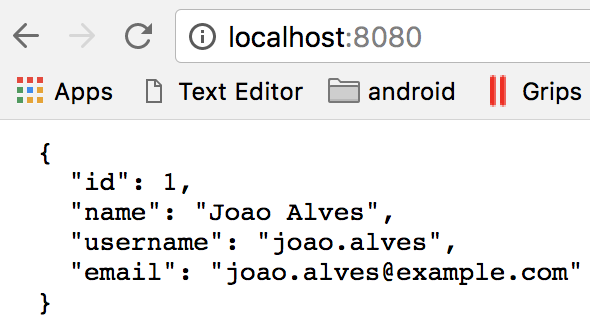
Done, super easy again. Much better to just replace this bit of hardcoded Json here and we don’t have to be updating our retrofit service all the time with a new URL. We could even make this better and read from a Json file instead for example. Now, if you go to localhost:8080 in your browser again you’ll see the new Json response:
If you want to add more routes to your backend it’s as easy as just adding a new get block inside the routing block:
get("/random") {
    call.respondText("random message", ContentType.Text.Html)
}
Give a try in your browser and you’ll see the different results for different routes. Pretty cool, we have a really lightweight Kotlin backend that we can easily use to do some quick testing while working on our network layers. No more GitHub gists with Json responses.
Integrated in Android app
Now some of you might be wondering if this is a gradle application and all you need is some gradle dependencies maybe we can actually run this server from inside an android app. Well, you’re right we can and our device will act as the server itself so if you run the server app you can go to your device browser and see the same results as above.
In order to achieve this there’s not much we need to do, so let’s add the server and make it run in our Kotlin Playground app. First, we add the same Ktor dependencies but in our application level build.gradle file. We also need to add the following snippet in order to prevent duplicate packaging of META-INF dependencies:
packagingOptions {
    exclude 'META-INF/*'
}
Then in our original HomeActivity from the first article, rather than having the button updating our dummy textview let’s have it start our server:
class MainActivity : AppCompatActivity() {

    override fun onCreate(savedInstanceState: Bundle?) {
        super.onCreate(savedInstanceState)
        setContentView(R.layout.activity_main)

        updateTextButton.setOnClickListener {
            runServer()
        }
    }

    fun runServer() {
        val jsonResponse = """{
                    "id": 1,
                    "name": "Joao Alves",
                    "username": "joao.alves",
                    "email": "joao.alves@example.com"
                }"""

        embeddedServer(Netty, 8080) {
            routing {
                get("/") {
                    call.respondText(jsonResponse, ContentType.Application.Json)
                }

                get("/random") {
                    call.respondText("random message", ContentType.Text.Html)
                }
            }
        }.start(wait = true)
    }
}
We also need to add Internet permission in the Manifest:
<uses-permission android:name="android.permission.INTERNET"/>
And then we’re ready to run the app. Give it a go and test it in your phone browser, you should see the same results.
Success right? We have the same super lightweight backend but now running inside an actual Android app, but how can this be useful? Well, a very good example is having a server test app where you could have a set of buttons or switches that would trigger different Json responses for each API. Imagine how cool that would be? You would just need to open the app and pick the response you want and then run your other app and test it.
This is just an example of something cool we could do with this but the possibilities are endless. You can obviously build upon this and create a proper backend with authentication and everything if you want. Because it’s Kotlin we just need to learn the framework itself and build it, we already own the language right? 😄
And that’s all for today, hope you enjoyed it, and if you did don’t forget to 👏 and share 😃.
For this article, I created a new GitHub repo with the standalone version of the server and also updated the Kotlin Playground repo with adding the server inside the app. See you at number 8 for some more Kotlin action 👋
Kotlin Static Analysis — why and how? ⇦ PREVIOUS
NEXT ⇨ Kotlin standard functions — just another guide