Joao Alves
Senior Engineering Manager at IndeedFlex
Firebase Android Playground — setting up and Analytics

Index:
- Firebase Android Playground — setting up and Analytics
- Firebase Android Playground — Authentication
- Firebase Android Playground — Realtime Database
- Firebase Android Playground — Cloud Messaging
Hello everyone, welcome to my latest article. Guess what, I decided to write a new series 😀. Haven’t used most of Firebase features and definitely didn’t set it up from scratch in any app, so thought that this would be a nice way to do it and share the experience at the same time.
The idea is to have one article for each of the main features Firebase offers for Android, and when the series is over we should have an App that contains at least a basic implementation of each of those features.
Note: this is will be a very simple app with no architecture patterns and most code just in the presentation layer, and also no dagger or koin for dependency injection. The goal is simply to show how to use Firebase features. There’ll be a link for the GitHub project at the bottom of each article as usual.
But enough of introduction let’s go ahead and start. In this first article, we’ll create our Firebase project, setup it up in the app and then implement the most simple feature available, Analytics.
Create the Firebase project
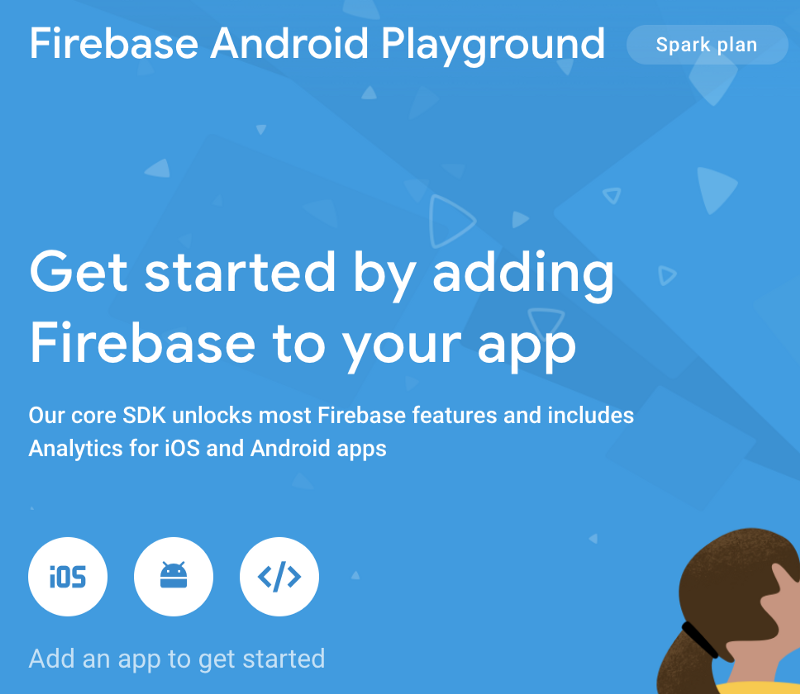
The first thing we need to do is to go to the Firebase Console and create a new project. Click Add Project and fill in the required project name and accept the terms and that’s it. You can customize the generated project id if you want (this will be part of the URL when using Real-Time Databases), or the location of your project but it’s not really necessary. We should now have something like this:
Now, we need to add our Android app details here to get the required configuration file. As mentioned, I created a new Android project specifically for this series, you can go ahead and create a new one and come back. If we tap the Android button on the image above, we get to this screen:
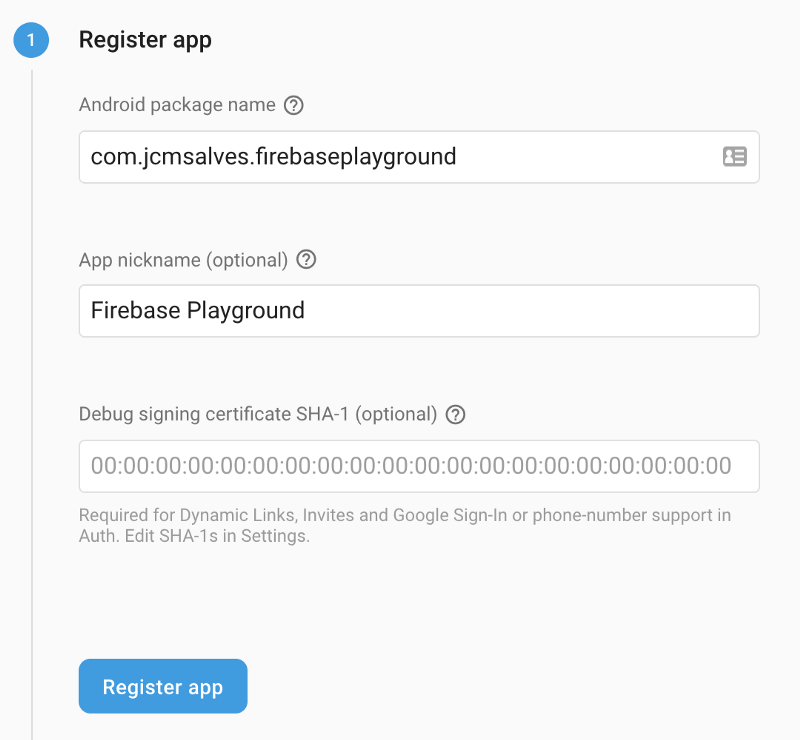
Here we need to add our App package name, an optional nickname and is also optional to add our Debug signing certificate. While this last bit is optional, I think it’s recommended to do and will also be required later on when we implement some of the authentication features, so we should do it (I intentionally omitted my key from the screenshot 🙈).
You can run ./gradlew signingReport or run the same task from the Gradle View tab under Project Name -> Tasks -> Android -> signingReport to get the app signing report. This will list all the signing configurations available for your project. You just need to copy the SHA-1 for the debug variant, paste it on that box above and that’s it.
Now all we need to do, is download the generated google-services.json file and put it in the root of our app folder in the project. And that’s it regarding configuration on the Firebase Console.
Dependencies
Up to our favourite section of each article 😃. Let’s add the required Firebase dependencies to our project. We need to add a classpath dependency and a couple of dependencies to our project level and application level build.gradle scripts respectively:
// project build.gradle
dependencies {
  classpath 'com.google.gms:google-services:4.0.1'
  ...
}


// app build.gradle
dependencies {
  implementation 'com.google.firebase:firebase-core:16.0.4'
  implementation 'com.android.support:support-v4:28.0.0'
  ...
}

// end of the file
apply plugin: 'com.google.gms.google-services'
Note: Since version 15.0.0 Firebase and Google Play services, have independent versions. This means that by default you’ll get some conflicts on your dependencies because FirebaseUI is by default using an older version of the support-v4 library. This is the reason we add that second dependency, you can check more details about these dependencies on the official guide.
Now we can just run the app, and if we go back to the Firebase Console we should see that our app was properly connected.
Log events
Setup is done, so let’s go ahead and add some Analytics to our project by logging some events. We don’t need any extra dependencies since Analytics is part of the core dependency we already added when setting up Firebase itself.
The AnalyticsSDK has a set of suggested events that are common in different types of apps but we can log our own custom events as well. Let’s look at the AnalyticsActivity and see how it looks after we add a reference to the FirebaseAnalytics instance and log some events:
class AnalyticsActivity : AppCompatActivity() {

    private lateinit var firebaseAnalytics: FirebaseAnalytics

    override fun onCreate(savedInstanceState: Bundle?) {
        super.onCreate(savedInstanceState)
        setContentView(R.layout.activity_analytics)

        firebaseAnalytics = FirebaseAnalytics.getInstance(this)

        // Log Firebase Event
        button_firebase_event.setOnClickListener {
            firebaseAnalytics.logEvent(
                FirebaseAnalytics.Event.SELECT_CONTENT,
                Bundle().apply {
                    putString(FirebaseAnalytics.Param.ITEM_ID,
                        "button_firebase_event")
                })
        }

        // Log Custom Event
        button_custom_event.setOnClickListener {
            firebaseAnalytics.logEvent(
                "SAMPLE_CUSTOM_EVENT_CLICKED",
                Bundle().apply {
                    putString(FirebaseAnalytics.Param.ITEM_ID,
                        "button_custom_event")
                })
        }
    }
}
Pretty simple, right? We first get a reference to the FirebaseAnalytics instance, and then we basically have a couple of buttons, one for each type of event (firebase default and custom). As you can see, it’s as simple as calling the logEvent() function and pass an event name and a bundle with the properties we want to log.
Now, let’s test these events. A quick way to test if we’re triggering the events properly is to do it in the console. In order to do that, we need to run the following commands:
adb shell setprop log.tag.FA VERBOSE
adb shell setprop log.tag.FA-SVC VERBOSE
adb logcat -v time -s FA FA-SVC
This basically enables verbose logging and displays the events in the Android Studio logcat so it’s quicker to validate if your events are working fine. Let’s see the logs after we try both events above:
Firebase event:
// Firebase event
10-12 06:10:54.235 V/FA-SVC  ( 2454): Event recorded: Event{appId='com.jcmsalves.firebaseplayground', name='select_content',
params=Bundle[{firebase_event_origin(_o)=app, firebase_screen_class(_sc)=AnalyticsActivity, firebase_screen_id(_si)=-9155352558049593446, item_id=button_firebase_event}]}
Our custom event:
// Our custom event
10-12 06:16:16.594 V/FA-SVC  ( 2454): Event recorded: Event{appId='com.jcmsalves.firebaseplayground', name='SAMPLE_CUSTOM_EVENT_CLICKED', params=Bundle[{firebase_event_origin(_o)=app, firebase_screen_class(_sc)=AnalyticsActivity, firebase_screen_id(_si)=-9155352558049593446, item_id=button_custom_event}]}
Easy, right? Apart from some default properties added from Firebase, we can see the name of the events on line 3 and the id we passed in the bundle on the last line. This is cool for quick testing but it’s nicer to check those on the Firebase Console. Firebase doesn’t start listing events until they are triggered by at least 10 different users but we can use the DebugView to see the events live. But let’s leave that for later after we set a user property as well.
User properties
First a quick introduction on user properties and what they are in case you don’t know. User properties, as per the official definition, are attributes we can define to describe segments of our user base. And now me trying to explain them 😃: when defined, they are basically attached to any event we log, including the ones we did before. This is what allows us to create the segments mentioned above, as we can create different combinations of events for specific user properties.
As with the events, Firebase automatically logs some user properties, like things about the device (brand, OS, model), app version and other things we don’t need to worry about. We can add our own user properties and at the moment this is limited to 25 per project.
Note: User properties are case sensitive, so if you add the same one with a different case not only it’ll count as 2 for the limit of 25, but you’ll also have more work when doing your segmentation dashboards as you’ll need to consider both separately.
But let’s go ahead and add a custom user property to our project. First, we need to go to the Firebase Dashboard and add our user property there. Go to the User Properties section on the left and you should see this screen after clicking the New User Property button:

Just add as much user properties as you want (we’re sticking to one for the example) and that’s it. Now, let’s see how we set our user property in our AnalyticsActivity code:
class AnalyticsActivity : AppCompatActivity() {

    private lateinit var firebaseAnalytics: FirebaseAnalytics

    override fun onCreate(savedInstanceState: Bundle?) {
        super.onCreate(savedInstanceState)
        setContentView(R.layout.activity_analytics)

        firebaseAnalytics = FirebaseAnalytics.getInstance(this)
        firebaseAnalytics.setUserProperty("my_test_user_property",
            "my test user property value")

        // Log Firebase Event
        button_firebase_event.setOnClickListener {
            firebaseAnalytics.logEvent(
                FirebaseAnalytics.Event.SELECT_CONTENT,
                Bundle().apply {
                    putString(FirebaseAnalytics.Param.ITEM_ID,
                        "button_firebase_event")
                })
        }

        // Log Custom Event
        button_custom_event.setOnClickListener {
            firebaseAnalytics.logEvent(
                "SAMPLE_CUSTOM_EVENT_CLICKED",
                Bundle().apply {
                    putString(FirebaseAnalytics.Param.ITEM_ID,
                        "button_custom_event")
                })
        }
    }
}
Super easy, we just added line 10 and that’s it, all the rest stays the same. Now both the other 2 events we have attached on the buttons click listeners will have this user property set.
Now, let’s look at the Debug View inside the Firebase Console to see our events being tracked live. To enable the debug mode we need to run the following line on the terminal:
adb shell setprop debug.firebase.analytics.app <package_name>
And this will stay on until we explicitly disable it again, with the following command:
adb shell setprop debug.firebase.analytics.app .none.
This is how our Debug View looks like after opening the app and triggering both events we have:
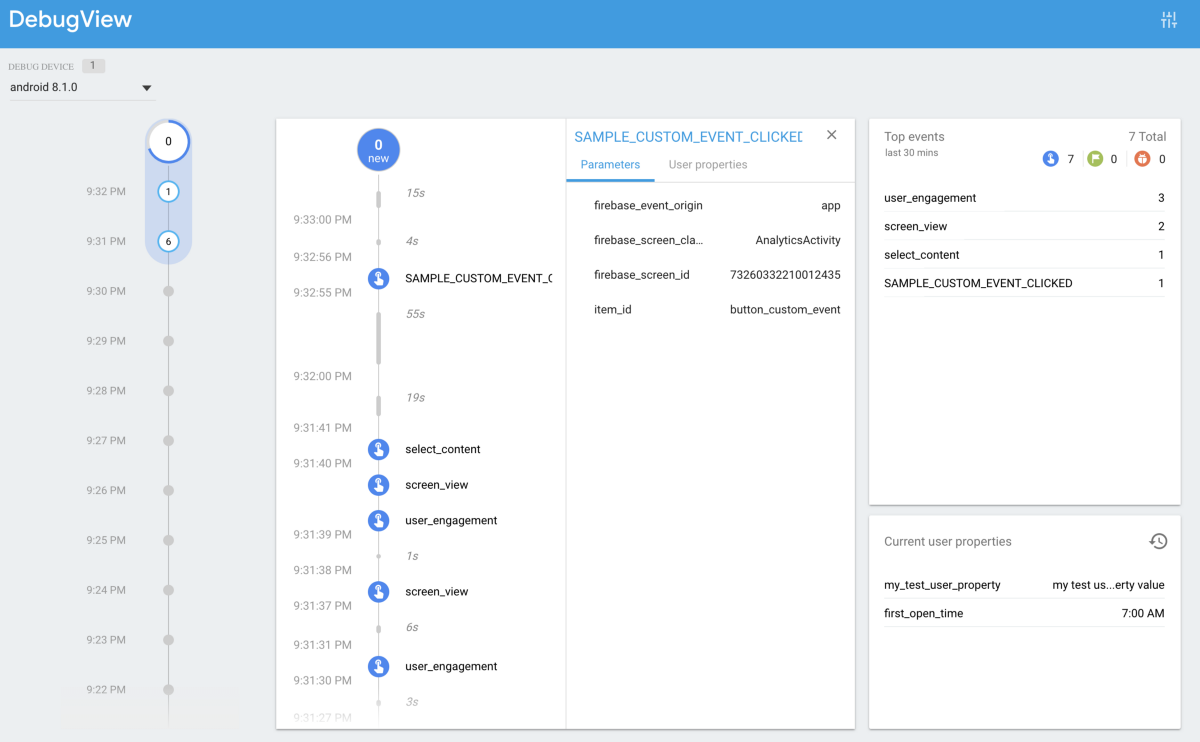
We get this nice timeline where we can quickly see our events being triggered, and if we look at the bottom right corner we can see our user property value as well. But this is only a simple view for the events, by adding Firebase Analytics to the project, we get a lot more analytics and stats for free. Check out the main dashboard and see for yourself the amount of data we get for free.
And that’s it, we’re done for today. We now have a project setup with Firebase, some dummy events tracking and we also set our own custom user property. Hope you enjoyed the article and if you did, please don’t forget to give some 👏. See you in a couple of weeks for a dive on Firebase Authentication 👋.
NEXT ⇨ Firebase Android Playground — Authentication