Joao Alves
Senior Engineering Manager at IndeedFlex
Store Screenshots, Data-Driven and Automated
Index:
- Cruzadex, 14 Years Later
- Scoring a Game With No Score
- Redrawing the Home Screen
- Making Players Think, Not Guess
- Store Screenshots, Data-Driven and Automated
With the available AI tooling, the slowest part of shipping an app these days isn’t building it anymore. It’s all the manual steps on the stores. Preparing the app to go live can be a tedious and time consuming task.
One of the biggest pains is screenshots. Both stores want them, in different sizes and configurations, and they need to be good, because for most people they’re the first real look at the app.
More than a screenshot 🖼️
It’s easy to take a few screenshots from an emulator at the right size and just upload them. It works, but if you want people who visit your listing to actually download the app, it’s not what you need. Raw screenshots don’t help the app get found in store searches, and they don’t do much to convince someone scrolling past to stop and download it.
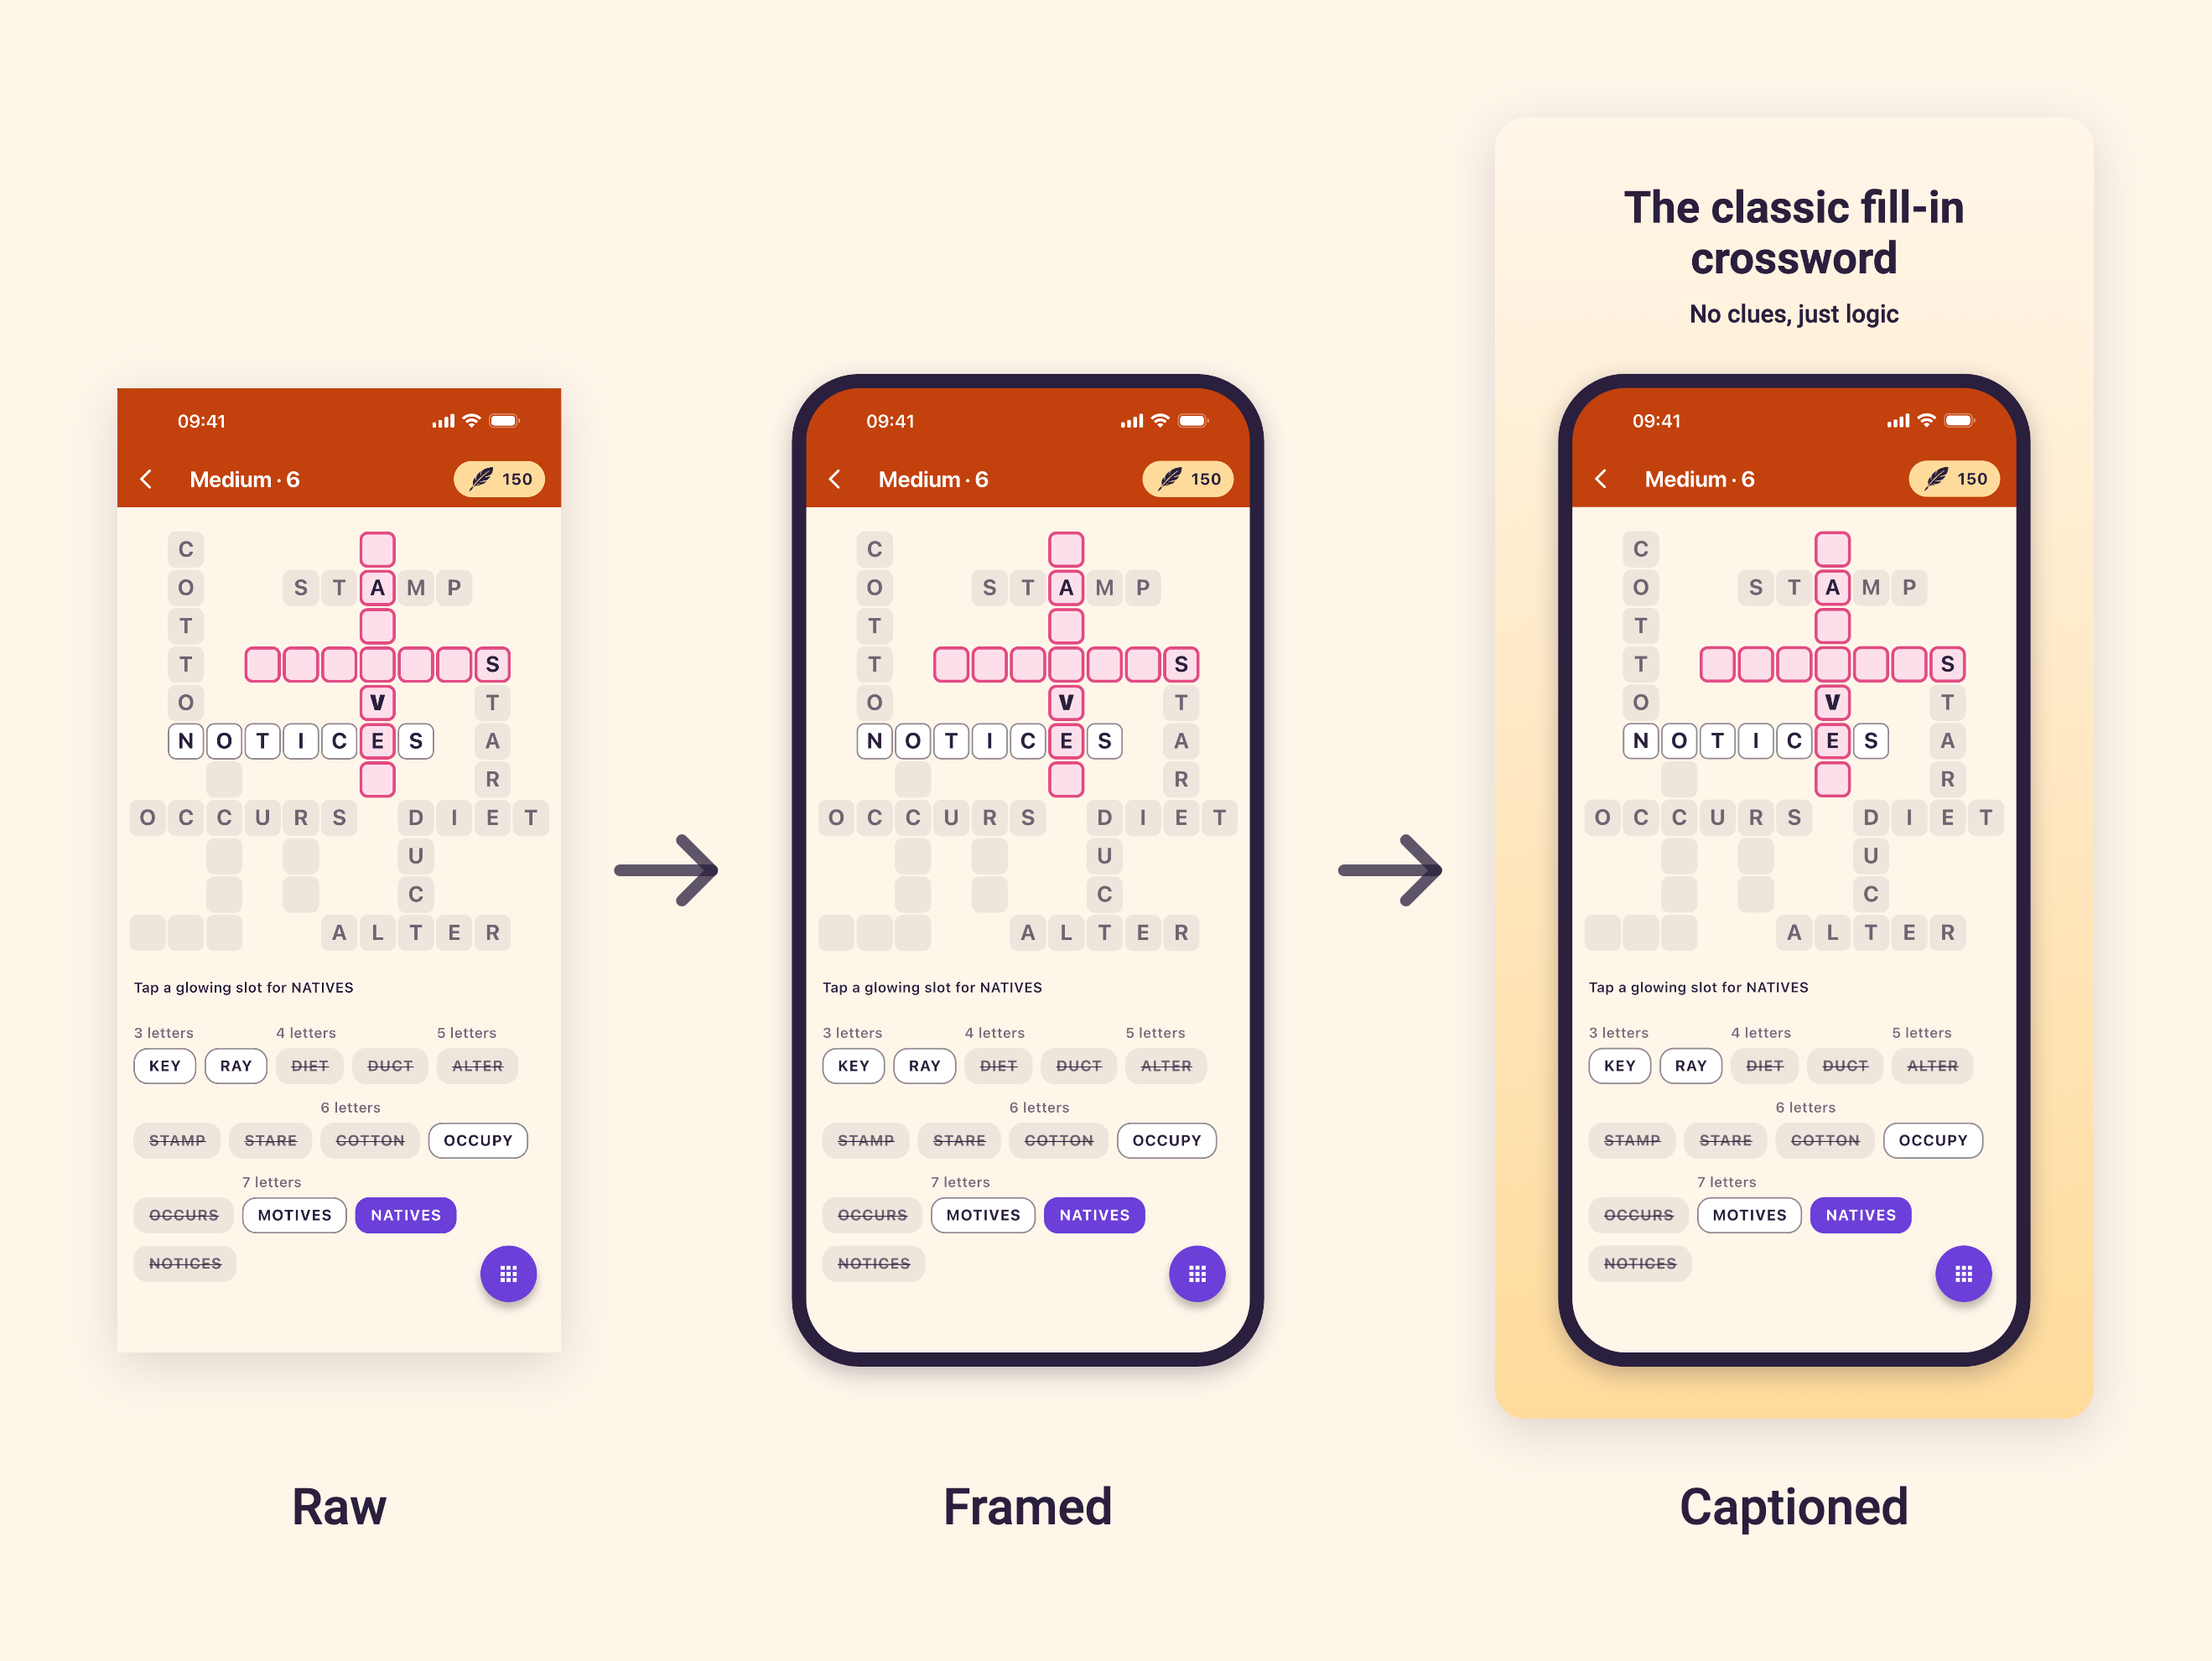
What I wanted were proper store images. The ones with a framed screenshot and a short caption that tells people what the game is, written with ASO (App Store Optimisation) in mind.
Building those by hand is a lot of work, though, and then each final image still has to match the exact size every store asks for. A raw screenshot from the right device gets the size right for free. Adding frames and captions immediately requires some image editing.
I used AppScreens for my other apps and it does the job really well. You upload the raw screenshots, pick a template for the frames, add the copy, and export. For something basic it works, but the free tier only gives one project and not much customisation, and in my opinion the paid tiers are not that cheap.
And even with a tool like that, it’s still all very manual and time consuming. Plus you have to do it all again the next time the app changes.
Why not let Claude do it? 🤖
Claude had already done a great job with the logo and the icons. Adding a frame and a caption around a screenshot felt like something it could handle easily. But rather than asking it to do it once, I wanted it done properly, with something I could run again every time the app’s UX changes, instead of a one-off set of images.
My brief to Claude was a process and a script that generates everything for both stores: framed screenshots with captions, in every mandatory size. The key line for me was that the code should be about putting the right data in place, not about the UX. The script just runs the real app in a specific state and captures it.
So every shot should come from the same player, with the same progress, so the whole set tells one consistent story.
Picking the shots 🎯
The goal for the whole set was the best ASO score possible, and convincing as many people as possible to download the game. To do that, the shots needed to show the core of the game experience: solving puzzles across the tracks, real progress on Home, and stats worth coming back for.
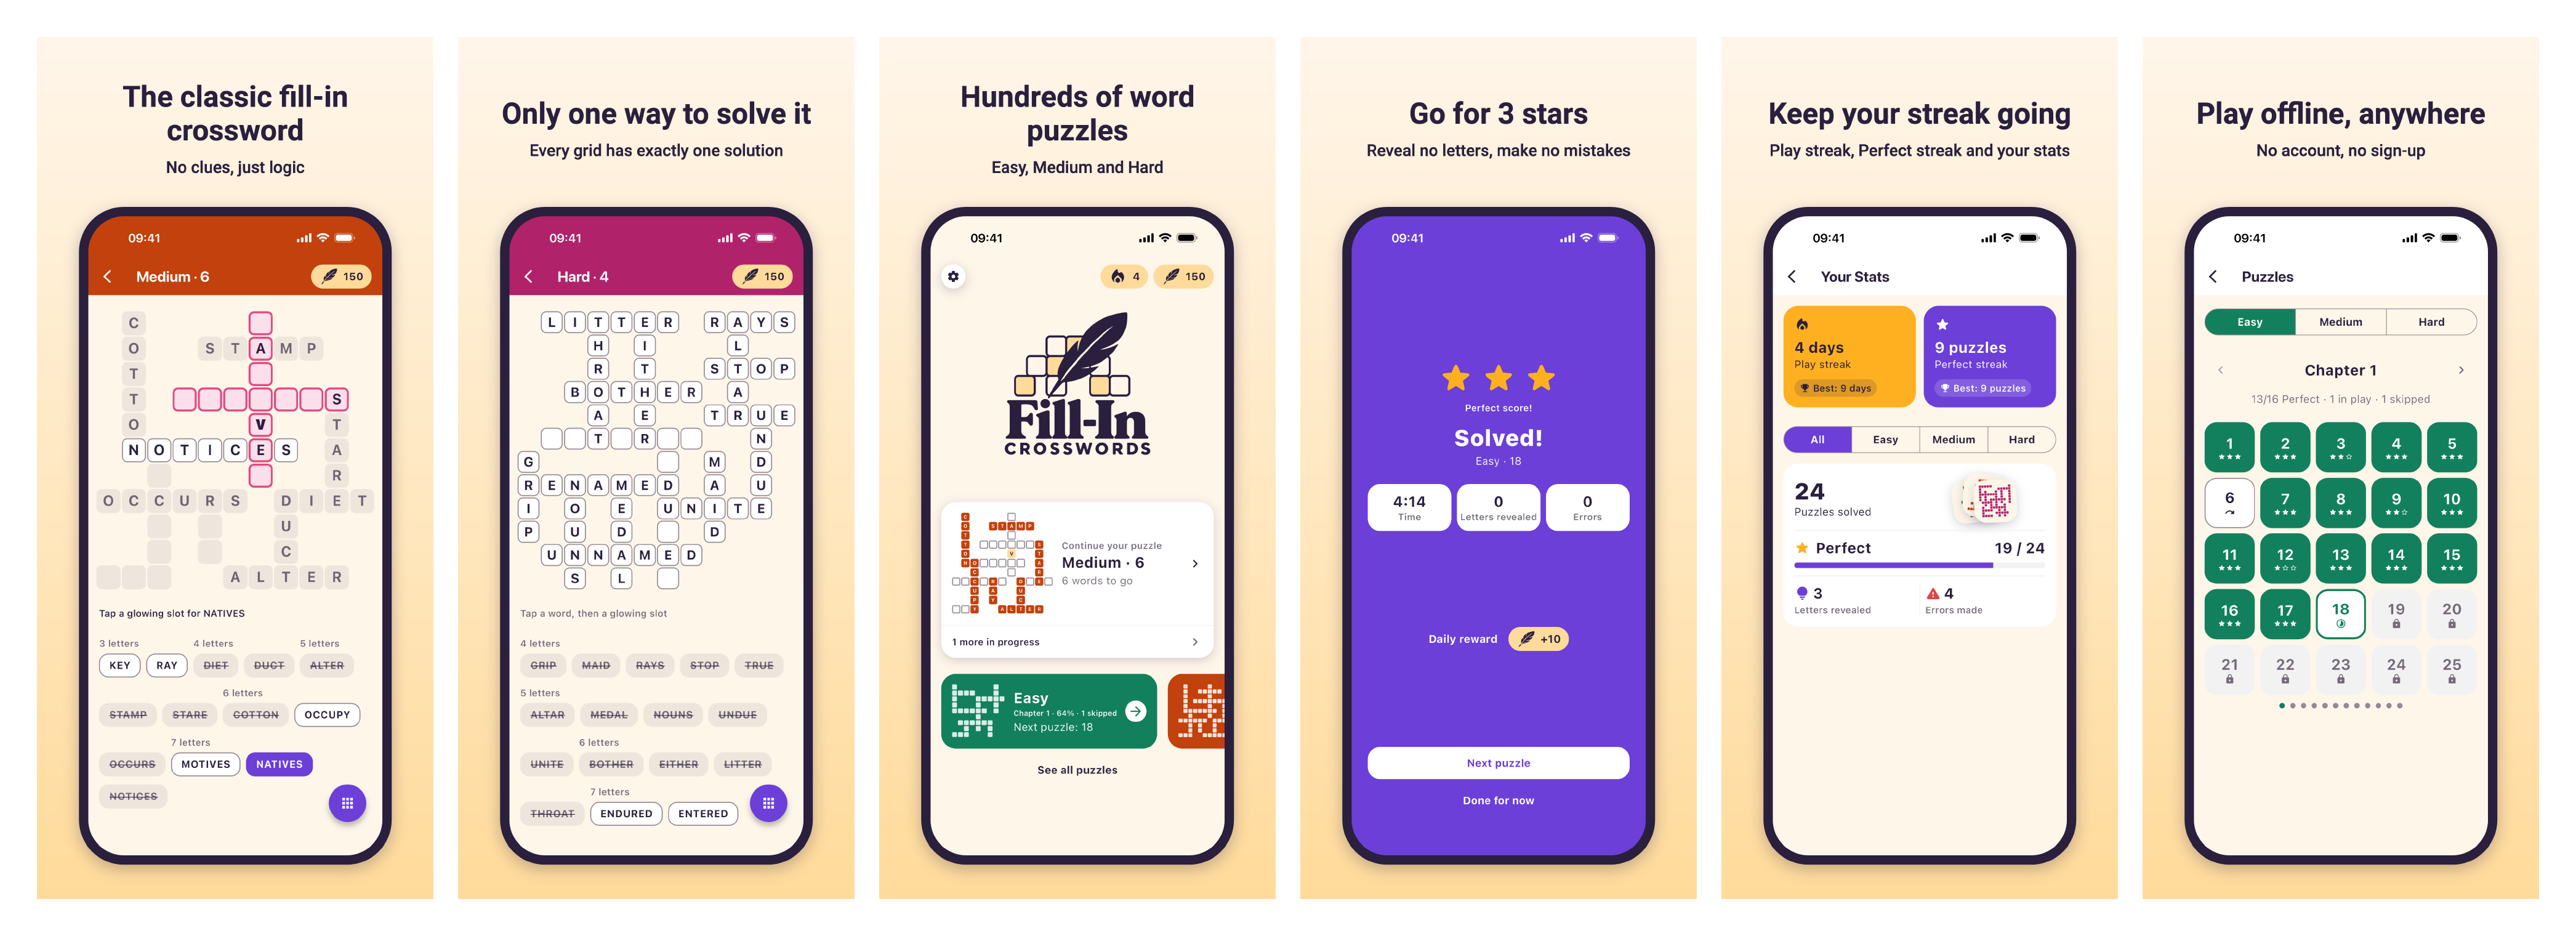
Claude’s first proposal was 8 shots, Google Play maximum. That felt like a lot. It had an extra puzzle and a dark mode screenshot that I didn’t feel were needed, so we dropped those and ended up with a final list of 6, each with its own caption:
- A Medium puzzle mid-solve: “The classic fill-in crossword. No clues, just logic”
- A Hard puzzle two words from solved: “Only one way to solve it. Every grid has exactly one solution”
- Home: “Hundreds of word puzzles. Easy, Medium and Hard”
- A Perfect solve: “Go for 3 stars. Reveal no letters, make no mistakes”
- Stats: “Keep your streak going. Play streak, Perfect streak and your stats”
- An Easy chapter: “Play offline, anywhere. No account, no sign-up”
Wrapping up 💭
One command (or prompt) now produces 6 shots for 3 store sets. iPhone and iPad for iOS, and phone size for Android. Each one raw, framed and with captions. That’s 54 images per run, plus a contact sheet to check them all at a glance. Now that I know it works, maybe I don’t need it to generate so many in-between images (raw and framed), and can simplify it to only the final store images and the contact sheet for checking.
A full run takes about 10 to 15 minutes, but a caption or colour change takes just seconds, so playing with the caption copy, and maybe A/B testing it, should be easy too.
And the next time the UX changes, it’s one command and a quick look at the contact sheet before uploading 🙂