Joao Alves
Senior Engineering Manager at IndeedFlex
From Medium to my blog - creating the website

As the name indicates, in this article I’m going through the process of how I created this website. I’ll explain which choices I made in terms of stack and also go through some important points I found along the way.
Picking up the stack
Let’s start with the technology stack. I looked into different things in the past and read a few guides on how to move from Medium to a personal blog. I remember reading guides for Wordpress, Ghost and many other things. But as explained in the first article, after a couple of recent chats with colleagues, my choice was reduced to the 2 stacks below.
Hugo vs Jekyll
The feedback for both platforms was good, they also don’t differ that much in the way they work and documentation seemed pretty good as well. I think if I have to choose one thing that made me pick one over the other was the theme. While both platforms have really cool themes with different pre-enabled features, I really enjoyed the one I’m using after playing a bit with it, so the choice was made.
I would add, that it seemed to me more straightforward with Hugo to have a clear separation between content and the actual website but might have been my perception from reading the docs and also the way it’s hosted/deployed, but more on that below.
I went with Hugo in the end, but I recommend having a look at both and pick for yourself, I’m sure you can be well suited with Jekyll as well. Have a play with both and see which works better with the set of requirements you might have.
GitHub Pages vs GitLab Pages
The main reason I reduced my framework shortlist to Hugo and Jekyll is that I wanted a really quick and easy way of hosting and deploying changes to the website.
Initially, based on some experience and the fact I started looking into Jekyll first, GitHub Pages looked like a made decision. But after looking into Hugo and their very straightforward documentation to host on GitLab, and the fact you can also use GitLab Pages from a private repository, I decided to go with that.
It’s super easy to add a .yml CI script to your project and have GitLab running the CI to publish your website for you, you literally just have to push the code to the repo. I’m sure there are plenty of GitHub actions guides to do the same with GitHub pages but having the official Hugo docs go with this option by default for GitLab, was another point in their favour.
As with the Hugo vs Jekkyll choice, I recommend having a look at both and pick for yourself depending on your requirements.
For me, in both decisions, I went with the simplicity of setting up and using as my main requirement. I wanted the lowest entry barrier and have the site up and running as quickly as possible and the Hugo/GitLab Pages combination did it for me and I’m quite happy with the choice.
Creating the website
With the stack chosen, now on to the actual implementation. I won’t go in too much detail as the official docs are pretty good, so will mostly list a few things I feel are important.
Setting up locally
I recommend following Hugo’s Quick Start Guide. There’s no point in me listing those instructions and eventually have them outdated. If you follow the official guide, you’ll have a basic website up and running locally with your chosen theme in literally 2 minutes or less.
For me, rather than working on a blank canvas, it made more sense to actually have the example site from the theme as a base. That is not very clear on the documentation, so if you want to do that follow these steps:
- After adding the theme as a git sub-module or manually downloading it, go to the
exampleSitefolder inside the theme - Copy what’s inside the
contentfolder into your project’scontentfolder - Copy any assets like images and/or others from the
staticfolder into the same structure on your projectstaticfolder.- This step will vary depending on the theme you choose as themes can handle some of the assets and paths differently so you have to look at the documentation to see the right structure, but usually copying the same structure as the example site does the trick.
One more thing to add is that are different commands to run your website locally. If you always use the default hugo server -D this launches the local server in Fast Render Mode so it’s possible that some changes (e.g. deleting files and/or folders) don’t immediately take effect and you either have to restart the server or do a hard refresh on the browser to see the changes.
Publishing
The first step is to create a repository that will host the project and the website. After you do that, as with the above steps, the best approach is to follow the official docs. As mentioned earlier the documentation is quite good and very easy to follow. Follow it and you’ll have your website ready on https://<YourUsername>.gitlab.io/<your-hugo-site>/ in no time.
If you don’t plan to use a custom domain for your website and are happy with the above format, make sure you update the baseUrl field in your Hugo config file to it, otherwise, for some internal links (depending on how the theme was built) you might have some redirections to www.example.org/your-hugo-site/ and you don’t want that. The same step is valid for when you’re using a custom domain, more on that below.
One point to add here as well is that if you go with a private repository, the hosted website will only be visible to you and other project members by default. If you want to make it public you need to open your GitLab project and go to Settings -> General -> Visibility, project features, permissions -> Pages and change the setting to Everyone.
Custom domain
I didn’t want to have my website under the GitLab repo default domain so decided to go with a custom domain. As expected, this is fairly easy to set up with a couple of caveats I’ll try to go through.
I decided to go with a .dev domain because why not? I’m a developer 😁. That decision comes with a particular requirement. .dev is a secure namespace, this means setting up SSL is required for your website to resolve.
There are several ways of doing this including buying a certificate together with the domain and having the setup all in the same place. There are different free options as well but this means having to set up stuff in the different providers (domain, SSL certificate and hosting) you choose, which can become a bit tricky if you’re not familiar with some of these things like I wasn’t 😁.
Because I wanted the simple route as described earlier, I went with the free and built-in solution GitLab Pages uses from LetsEncrypt and it worked quite well. You can use this for domains that don’t require SSL as well and get the added security for free.
The best way to set up everything is again following the official documentation. It’s very detailed and easy to follow but depending on which provider you used to get your domain, it might be a bit easier to match the terms used or not. I used Name.com for reference, and it was fairly easy to follow.
The one thing worth adding is that to make the www subdomain work with SSL, I ended up having to create a separate custom domain with it.
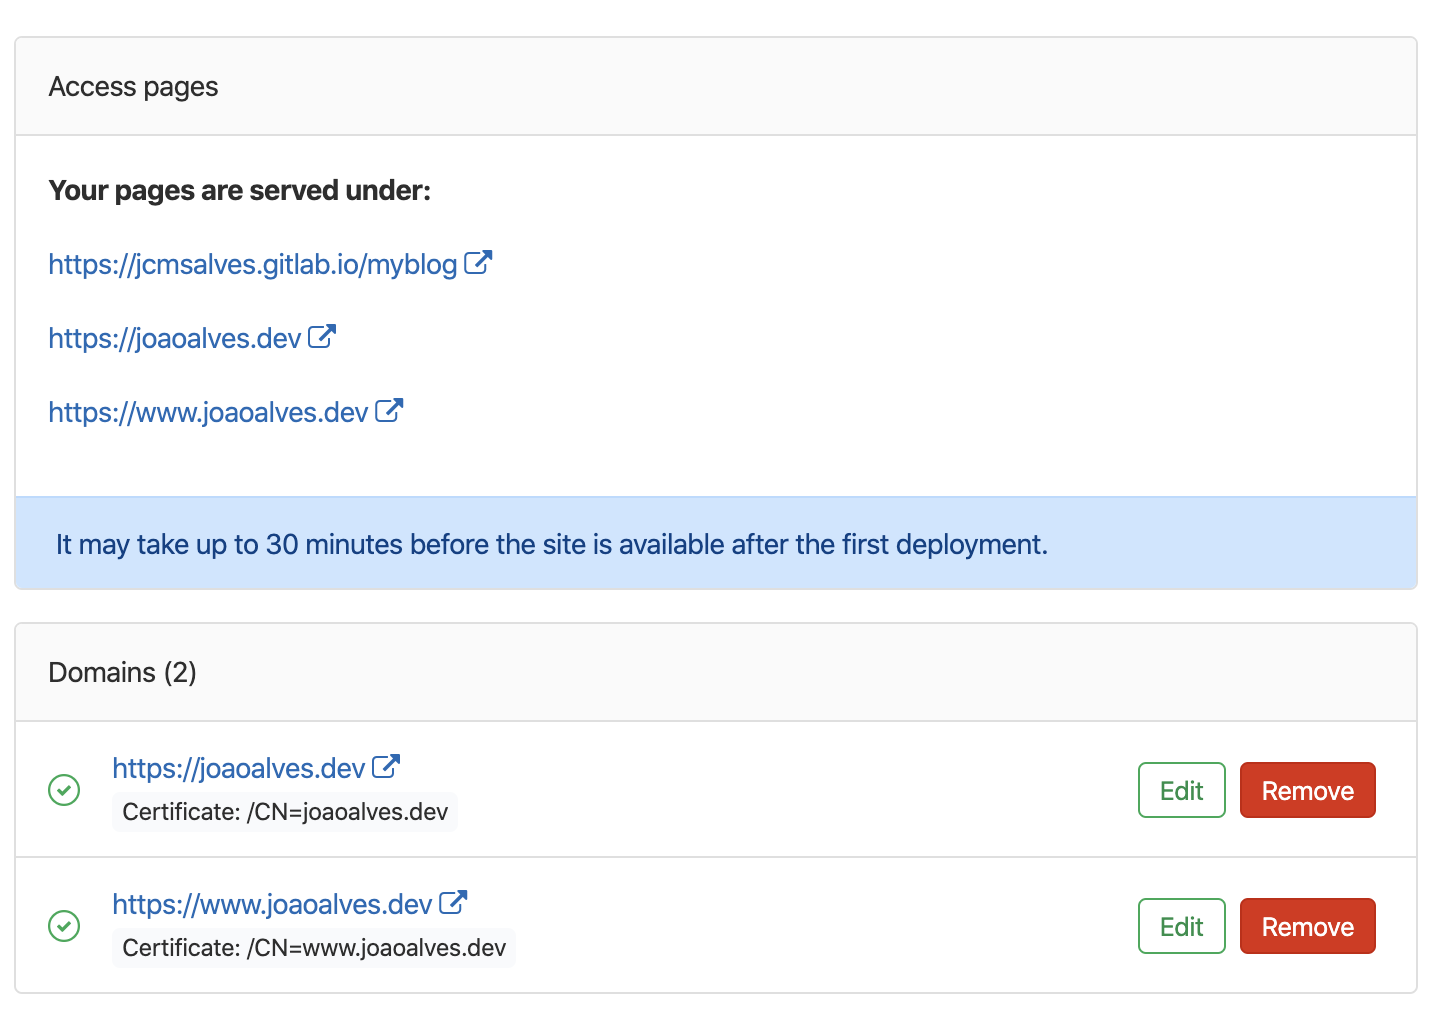
And then add 2 extra entries in the DNS records.
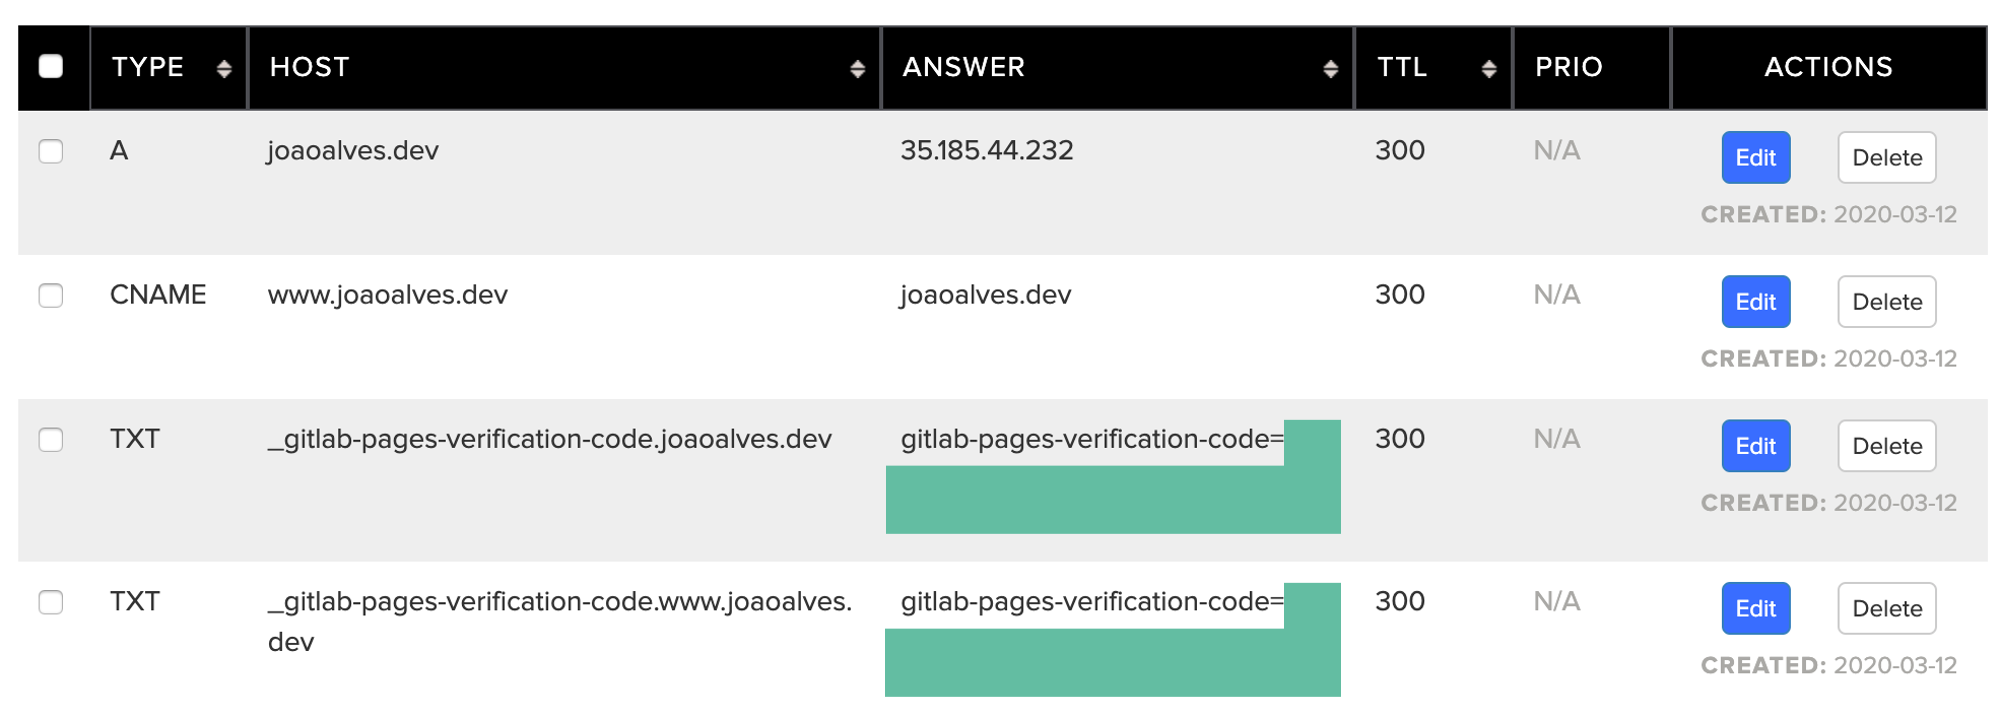
Adding just the CNAME entry that in theory would be enough to just redirect the traffic, but for some reason, it didn’t work. I tried with different Name.com settings and guides and was never able to make it work until I actually added www as its own custom domain on GitLab Pages.
There’s probably a better way to have this set up but I have it working fine now so not planning on touching it. Let’s just say that getting back to all this web development stuff has been interesting 😁.
After the domain ownership is verified, the actual certificate being ready can take a little bit to propagate (not too long) but after that, your website should be ready to go with SSL under your chose domain name.
Don’t forget the last step from the previous section. If you haven’t yet at this stage, you need to update the baseUrl param on your website config file.
Customisng the theme
Just before we finish this one, with the way themes are normally set up in Hugo, you can also customise them and make the website look more like you want to. Depending on your HTML and CSS knowledge or your courage to break stuff and undoing it a lot of times (in my case 😁), you can come out with something really custom for you if you wish to.
I really like the theme I chose (Ezhil theme) in terms of simplicity and how clean it is. If you’ve been following me for a while, you know I like minimalism. I also like the set of features it provides by default, like the Google Analytics or the Disqus integration for example.
But I have to say the default colour scheme is not my favourite and the same way I loved the theme simplicity I also fell in love with the colour scheme on the Notewhorty the first time I saw it, so I ended up customising the CSS to use this theme colour scheme instead. I also really like the social navigation menu on the theme I chose, so I added it to the footer as well and made a few other tweaks here and there (e.g. changing the way single page - not posts - titles look like).
This depends on the theme you choose and how it defines or not special params to include custom CSS files or specific layouts but on a crude way, if you copy the static and layout folders from the theme into your website root and override anything in there, it takes precedence over the theme so you get your changes.
One thing to keep in mind is how drastically you change things, particularly on the HTML templates side. If you do quite a bit and the theme itself releases an update in the future it might be trickier to consume it without a lot of manual work.
And this is it for today, hopefully by following this guide and both Hugo and GitLab documentation you now have your own website with a custom domain up and running. Feel free to ask any questions or leave any feedback in the comments below.
I’ll soon write about the particular experience of migrating my medium content to the website, so stay tuned and see you around 👋.